
DIY Abstract Art
Art has always been something I’ve thoroughly enjoyed as a down time activity. My family on my mothers side are all wonderful painters and I’ve picked up a thing or two from them over the years.
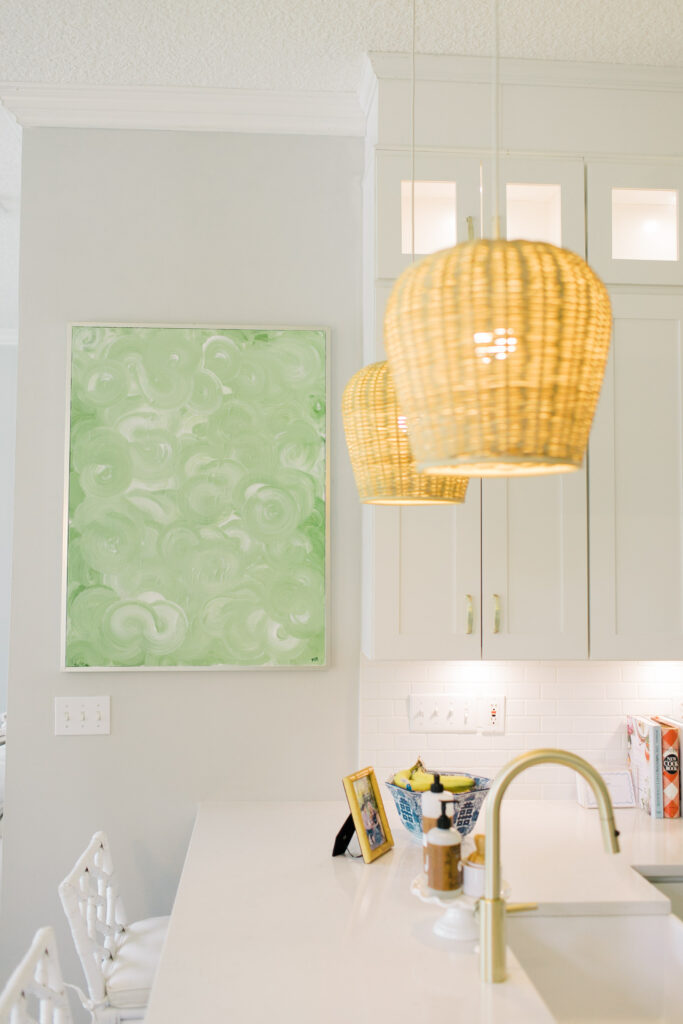
As we’ve renovated our homes, tackling wall decor is tough sometimes! Having art throughout your home, whether it’s done by you or not, is a way to not only show your personality but it truly is so calming and inspiring to see in your house each day.
Today I am breaking down the basics of what I do to paint abstract art so you can save a buck and get creative!
A few tips:
- I’ve found that Walmart + Hobby Lobby has great and inexpensive canvases, but the CHEAPEST route is to go to a discount store (Ross, TJ Maxx, etc) and actually buy a canvas art piece. Usually I can get a huge canvas for $20-$30. To paint over the existing art, you need Gesso to fully cover up the colors underneath. Let the Gesso fully dry before painting over.
- I use a little more expensive paint now that I’ve been doing this for a while. For most abstract art, I like using a thicker body acrylic paint so it dries with texture instead of flattening.. I like this kind I have from Amazon.
- Find the spot you want to hang up the canvas prior to painting, and hang it up as you make your final touches (be careful with wet paint – I put a towel down on the floor). This allows me to see it in the space as I am finishing.
- I recommend for any painting that you look around your room + house to get a feel for the colors you want to use. They don’t have to match perfectly, and really don’t even have to match at all if you want a pop.
The Twist
This one is very beginner friendly. These always turn out beautiful, and you truly can’t mess them up!
For the Twist, lay your canvas flat on the ground and drop each color all over the board. You can experiment with this as you go if you want more spots to be heavier in one color than another.
Take a larger brush, about 2+ inches thick and start swirling. It will take a few tries to get the motion right, but start with making “S” curves, then go over a part of it with a circle motion to layer.
You can always add more as it dries to layer.
Confetti
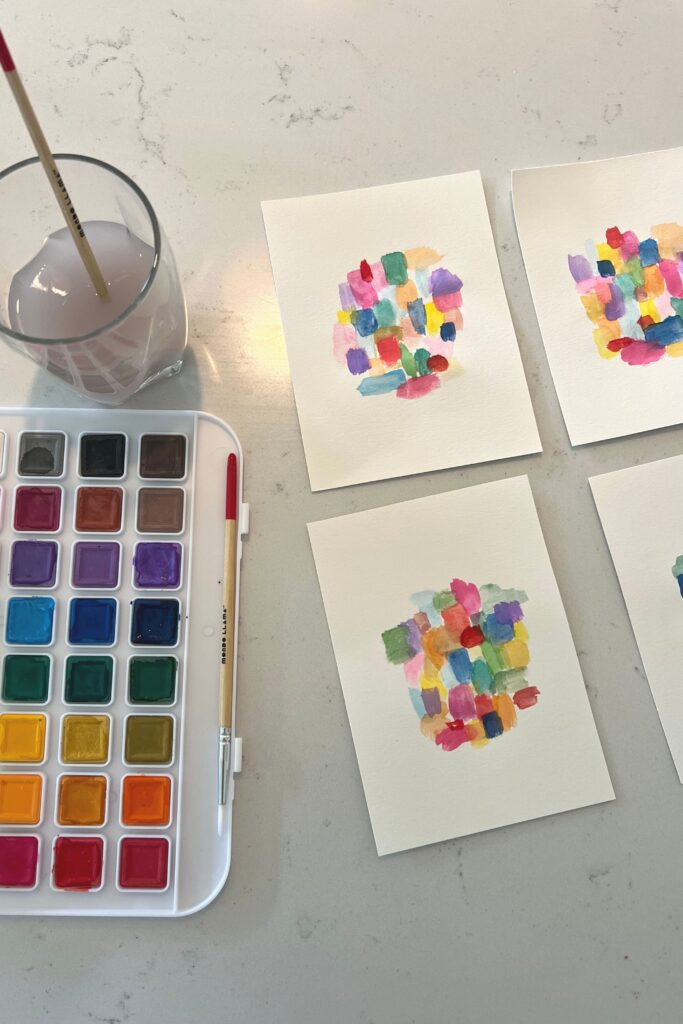
I made this one for above our bed and love the pop it gives our bedroom.
This one you can do with acryllic, just make sure it fully dries with each layer so your colors do not mix.
I used watercolor + watercolor paper + a smaller, 1/3 inch watercolor brush.
Literally, you just dip your brush in water, get paint wet, and paint small strokes for each color. It truly is so simple! Do one layer at a time, one color at a time.
For both a small and large scale print, this makes such a pretty statement! You can do lots of colors like me, or dark to light shades of one or two specific colors would be beautiful too.
Contemporary Abstract
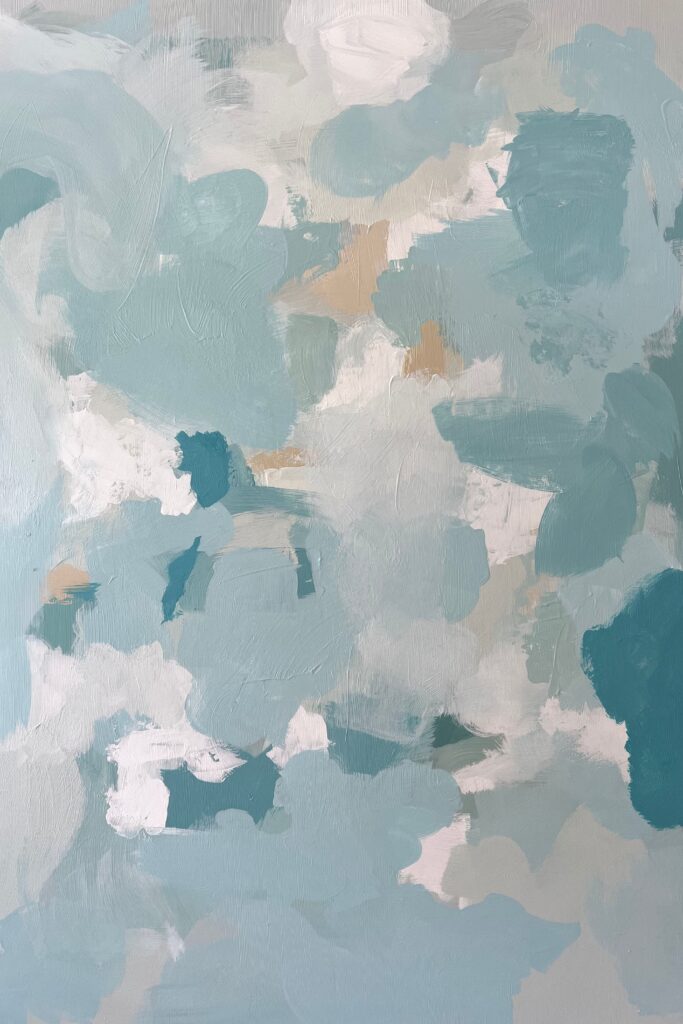
This one is a little more intermediate, but with some practice you will get in a groove and figure out the tricks that work for you. Youtube is a great tool for quick learning!
Same start with this type, you’ll definitely want a thicker body acrylic paint. The reason I don’t use oils is because it takes absolutely forever to dry, and I am an impatient + messy painter who adds a lot of layers. The first time I painted with oil, it took a month for the thing to dry! But, try oil at least a few times if you fall in love with painting because you may love oils. There is something so beautiful about oil paintings that acrylic paint just can’t quite do.
The basics for this type of art is a few different size paint brushes, a few different size palette knifes for layering and textures, and patience. You can add in things like chalk, water drips, charcoal, etc if you’d like!
I mentally have an idea of how I want it to look when I see it in the spot its going to be hung up. For abstract, most of the time I work from the middle, out.
Layer, layer layer. For some sections, you can wait until its fully try to paint your next layer if you want a harder looking layer, but for others, you can blend as it dries. I hope that makes sense, please comment below if you need some clarification 😉
The biggest thing is keep working with it! You can let it dry and come back the next day or week if you need a break, but once it’s done you will be so proud of your work and it will look FABULOUS!
